Preparing artwork for custom advent calendar boxes is not only a graphic design task. For B2B packaging buyers, artwork must match the box structure, insert layout, compartment size, product weight, printing method, finishing process, and export packing plan.
If the artwork is prepared without considering product fit, small errors can affect drawer alignment, door numbering, foil position, insert cavities, and final shelf presentation. This is especially important when the calendar includes fragile products, mixed SKUs, cosmetic items, small gifts, confectionery, stationery, candles, or promotional kits.
Giftpackpro works with overseas brands, wholesalers, gift companies, and purchasing teams that need both packaging structure and print-ready production files. As a custom advent calendar boxes manufacturer, we usually recommend confirming the structure and insert plan before finalizing artwork.
Why Artwork Preparation Matters for Advent Calendar Packaging
An advent calendar box has more artwork control points than a simple gift box. It may include an outer sleeve, rigid shell, drawers, numbered doors, inner tray, dividers, labels, inserts, and shipping carton marks. Each part must follow the correct dieline.
The artwork should support both branding and production. A beautiful layout is not enough if the fold lines, cut lines, glue areas, bleed, window position, or insert openings are not considered.
Common artwork-related risks
- Door numbers are too close to cut lines or perforation lines.
- Important logo areas sit on folds, drawer edges, or glue flaps.
- Foil stamping artwork is too thin for stable production.
- Colors look different between sample proof and bulk production.
- Product names do not match compartment sequence.
- Insert cavities are designed before real product dimensions are checked.
- Outer carton marks do not match the buyer’s warehouse or retailer requirements.
Confirm the Box Structure Before Designing Artwork
Before preparing artwork for custom advent calendar boxes, buyers should confirm the basic structure. A drawer-style calendar, door-opening calendar, rigid book-style calendar, and folding paperboard calendar all need different dielines and artwork layouts.
If you are still comparing box styles, review available custom advent calendar box products before locking the artwork direction. Structure affects print areas, opening method, insert depth, packing volume, and unit cost.
Artwork points by structure type
| Calendar Structure | Artwork Focus | Insert and Fit Notes |
|---|---|---|
| Drawer-style advent calendar box | Drawer front numbering, outer sleeve artwork, pull tab position, logo alignment | Works well for small gifts, cosmetics, stationery, and mixed SKUs. Drawer tolerance must be checked during sampling. |
| Door-opening paperboard calendar | Perforation lines, door numbers, hidden graphics, crease safety area | Good for lightweight items. Product movement control is important when cavities are shallow. |
| Rigid book-style calendar | Cover artwork, spine position, magnetic closure area, inner tray layout | Suitable for premium sets. Insert depth and product weight should be confirmed early. |
| Fold-out calendar box | Panel sequence, folding direction, front cover design, inner spread artwork | Useful for storytelling layouts, but artwork must follow the opening order clearly. |
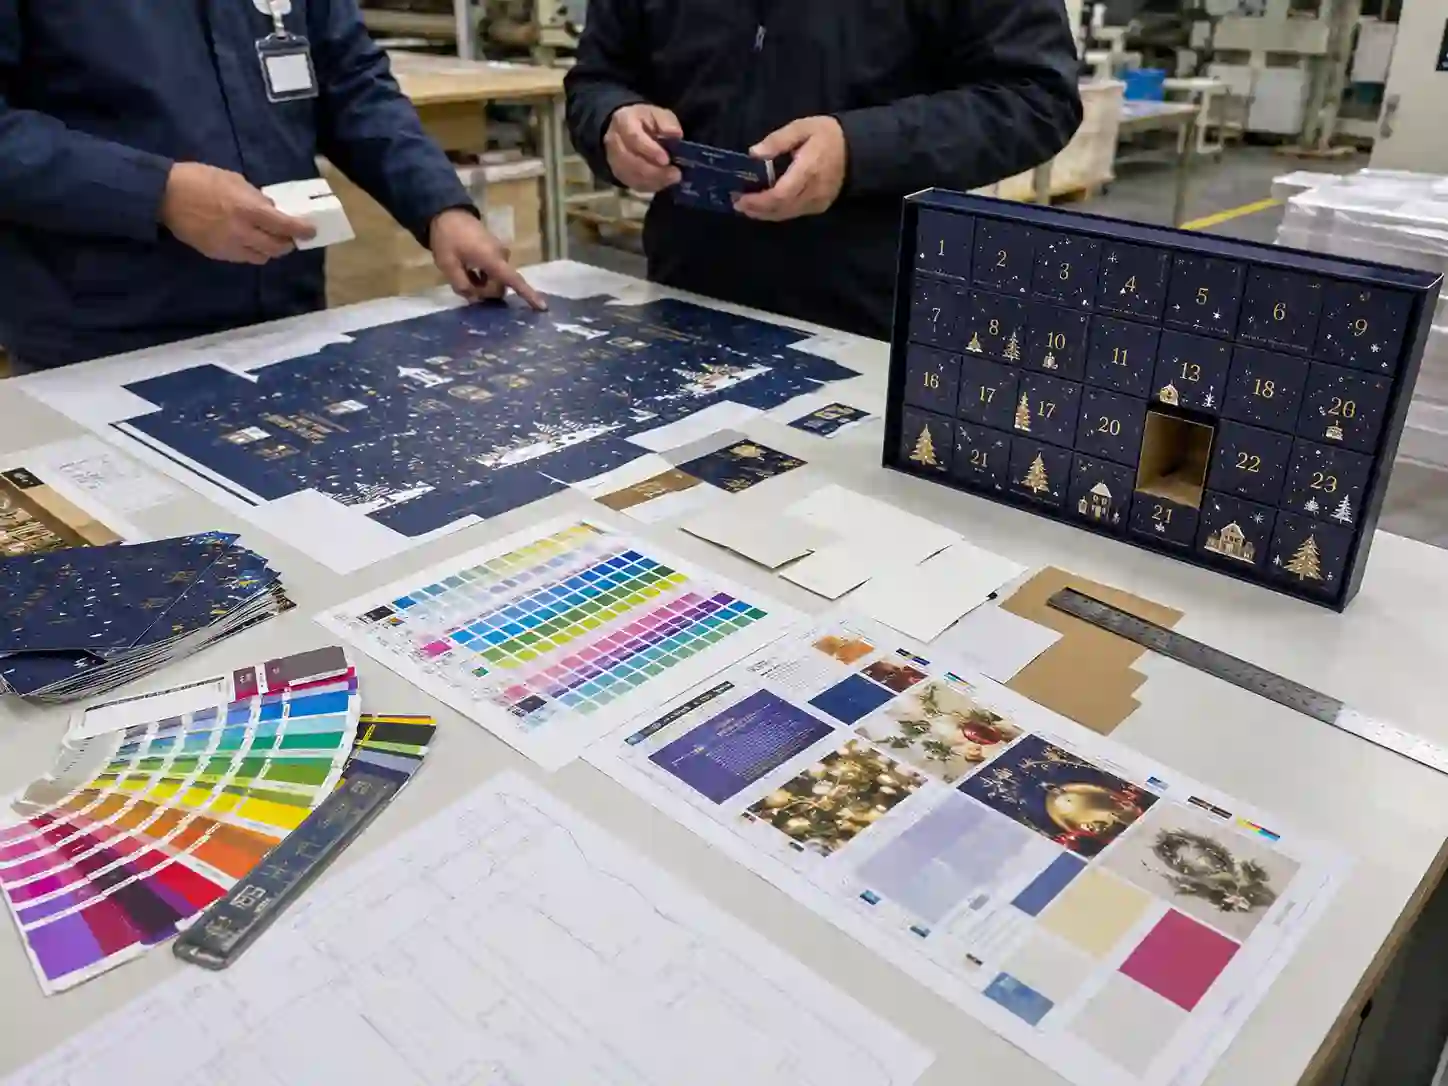
Prepare the Correct Dieline and Artwork Layers
A production dieline is the base file for artwork preparation. It shows cut lines, crease lines, bleed areas, glue areas, folding direction, window positions, and safe zones. Buyers should not use a rough mockup as a final production file.
For most custom projects, Giftpackpro prepares the dieline after confirming box size, product dimensions, insert style, and structure. Buyers can then place artwork on the dieline and return editable files for checking.
Recommended artwork file setup
- Use editable vector files when possible, such as AI or PDF.
- Keep cut lines, crease lines, artwork, text, foil, embossing, spot UV, and varnish on separate layers.
- Convert fonts to outlines or provide font files if allowed by license.
- Set proper bleed, usually around 3 mm unless the factory confirms otherwise.
- Keep important text and logos away from edges, folds, perforations, and glue areas.
- Use high-resolution images, usually 300 dpi at final print size.
- Mark Pantone colors, CMYK values, and special finishing areas clearly.
If your team needs support from structure planning to dieline checking, review our custom advent calendar box services before preparing final print files.
Match Artwork With Inserts and Product Fit
The monthly focus for many buyers is product fit. Artwork should not be designed separately from the insert. The insert controls how each product sits inside the calendar, how the buyer opens each compartment, and how the box performs during transport.
Common insert materials include paperboard, EVA, foam, molded pulp, and plastic trays. For B2B seasonal packaging, paperboard and molded pulp are often preferred when buyers want recyclable paper-based options. EVA and foam are useful for more protective presentation, especially for fragile or irregular products.
Paperboard inserts
Paperboard inserts are widely used for lightweight gifts, stationery, confectionery packs, small accessories, and promotional items. They are cost-effective and can be printed or matched with the box color. However, cavity strength depends on product weight, insert thickness, and folding structure.
EVA and foam inserts
EVA and foam inserts offer better cushioning and a premium fitted look. They are often used for glass bottles, fragrance samples, cosmetic jars, delicate ornaments, and products that need tight positioning. Artwork planning should allow enough space for finger notches, cavity spacing, and product removal.
Molded pulp inserts
Molded pulp inserts can be useful for buyers who want a paper-based protective option. They may suit candles, small jars, fragile gift items, and eco-positioned product lines. Since molded pulp has its own texture and tolerance, the packaging artwork should not rely on extremely tight visual alignment with every cavity.
For buyers who care about certified paper sources, the official Forest Stewardship Council website is a useful reference when discussing FSC-related packaging requirements with suppliers.
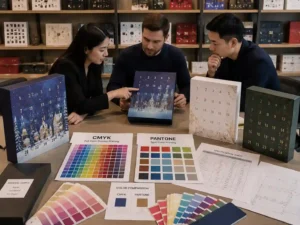
Plan Printing Colors, Proofs, and Finishing Early
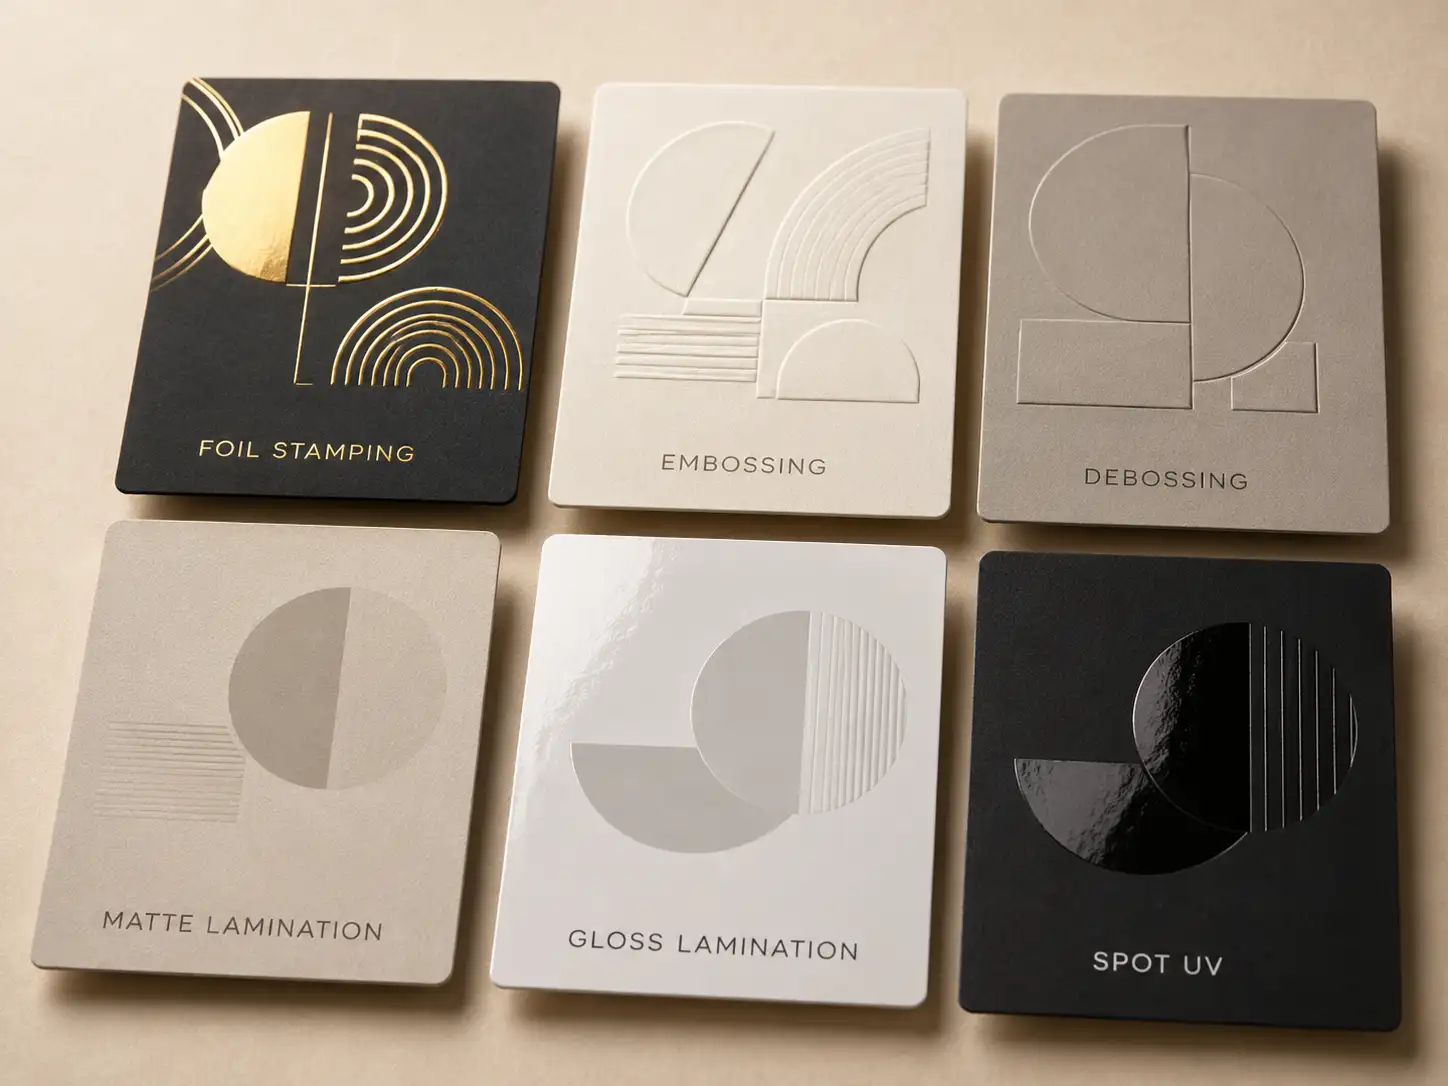
Artwork for custom advent calendar boxes should define printing and finishing before sampling. Do not wait until bulk production to decide whether the design needs matte lamination, gloss lamination, soft-touch film, foil stamping, embossing, debossing, spot UV, glitter effect, or metallic ink.
Each finishing process has limits. Thin lines may not stamp cleanly. Small text may not emboss well. Heavy ink coverage may need extra drying control. Dark backgrounds may show scratches more easily during packing and shipping.
Color control for B2B production
For repeat orders or retail programs, buyers should provide clear color references. Pantone numbers, approved printed samples, CMYK values, and previous production samples are useful. A screen image alone is not enough because monitors display color differently.
Many printing workflows refer to process control standards such as ISO resources. For practical purchasing work, the key point is simple: confirm the proofing method, approval standard, and acceptable color tolerance before bulk production.
Special finishing checklist
- Mark foil stamping areas in a separate artwork layer.
- Keep embossing and debossing artwork simple enough for stable production.
- Confirm whether lamination is matte, gloss, soft-touch, or anti-scratch.
- Check whether spot UV overlaps with crease or cut lines.
- Avoid placing important finishing details on drawer edges or perforated doors.
- Request a sample if the finishing effect is important for retail presentation.
Check Compartments, Numbering, and Product Sequence
Advent calendar artwork often includes numbers, product names, small icons, or hidden messages. These details must match the insert layout and product loading sequence.
Before sample production, buyers should prepare a simple product map. It should show which item goes into each drawer, door, or compartment. This helps the factory check cavity size, depth, artwork number position, and packing order.
Example product map details
- Compartment number
- Product name or SKU code
- Product size and weight
- Product orientation inside the cavity
- Fragile or leakage risk
- Required insert material
- Special loading notes
This step is useful for beauty brands, candle companies, confectionery buyers, stationery sets, toy gift sets, and promotional product campaigns. It also reduces communication errors when several SKUs are packed into one calendar.
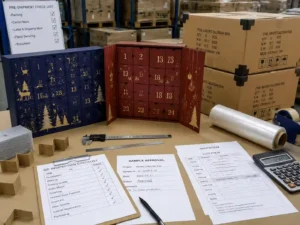
Use Sampling to Test Artwork and Fit Together
A sample should not only check printing appearance. It should also test opening feeling, product fit, insert strength, drawer movement, door tearing, product loading, and export packing protection.
For first-time projects, a white sample can confirm structure and size before full printed sampling. After that, a printed sample can check color, artwork placement, finishing, insert fit, and product presentation.
What to review on the sample
- Does the outer artwork align with the structure?
- Are the numbers readable and correctly positioned?
- Do drawers or doors open smoothly?
- Does each product fit without shaking too much?
- Are fragile products protected by the insert?
- Does foil, embossing, or lamination match the approved artwork?
- Can the final box pass realistic handling and packing checks?
More practical production topics are available in our advent calendar box buying guides, especially for buyers comparing structure, inserts, artwork, sampling, MOQ, and lead time.
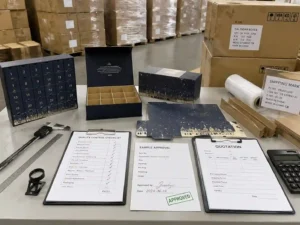
Prepare Quote Details Before Sending Artwork
Accurate quotation depends on more than artwork size. To avoid repeated back-and-forth, buyers should prepare the full packaging brief before asking for a quote.
If you already have confirmed artwork, product dimensions, and target quantity, you can request a custom quote with clear project details. If some details are not final, explain which parts are flexible.
Useful quote information to send
- Box structure: drawer, door-opening, rigid, folding paperboard, or custom style
- Overall box size and product size
- Number of compartments
- Insert material: paperboard, EVA, foam, molded pulp, or other option
- Printing method and color requirements
- Finishing: lamination, foil, embossing, spot UV, or special texture
- Target quantity and expected MOQ range
- Sample requirement and deadline
- Bulk production schedule
- Export packing, carton marks, palletizing, or retailer requirements
Quality Control Before Bulk Production and Export
After sample approval, the production team should use the approved sample and artwork file as the control standard. This helps maintain consistency during printing, mounting, die cutting, assembly, insert loading, and packing.
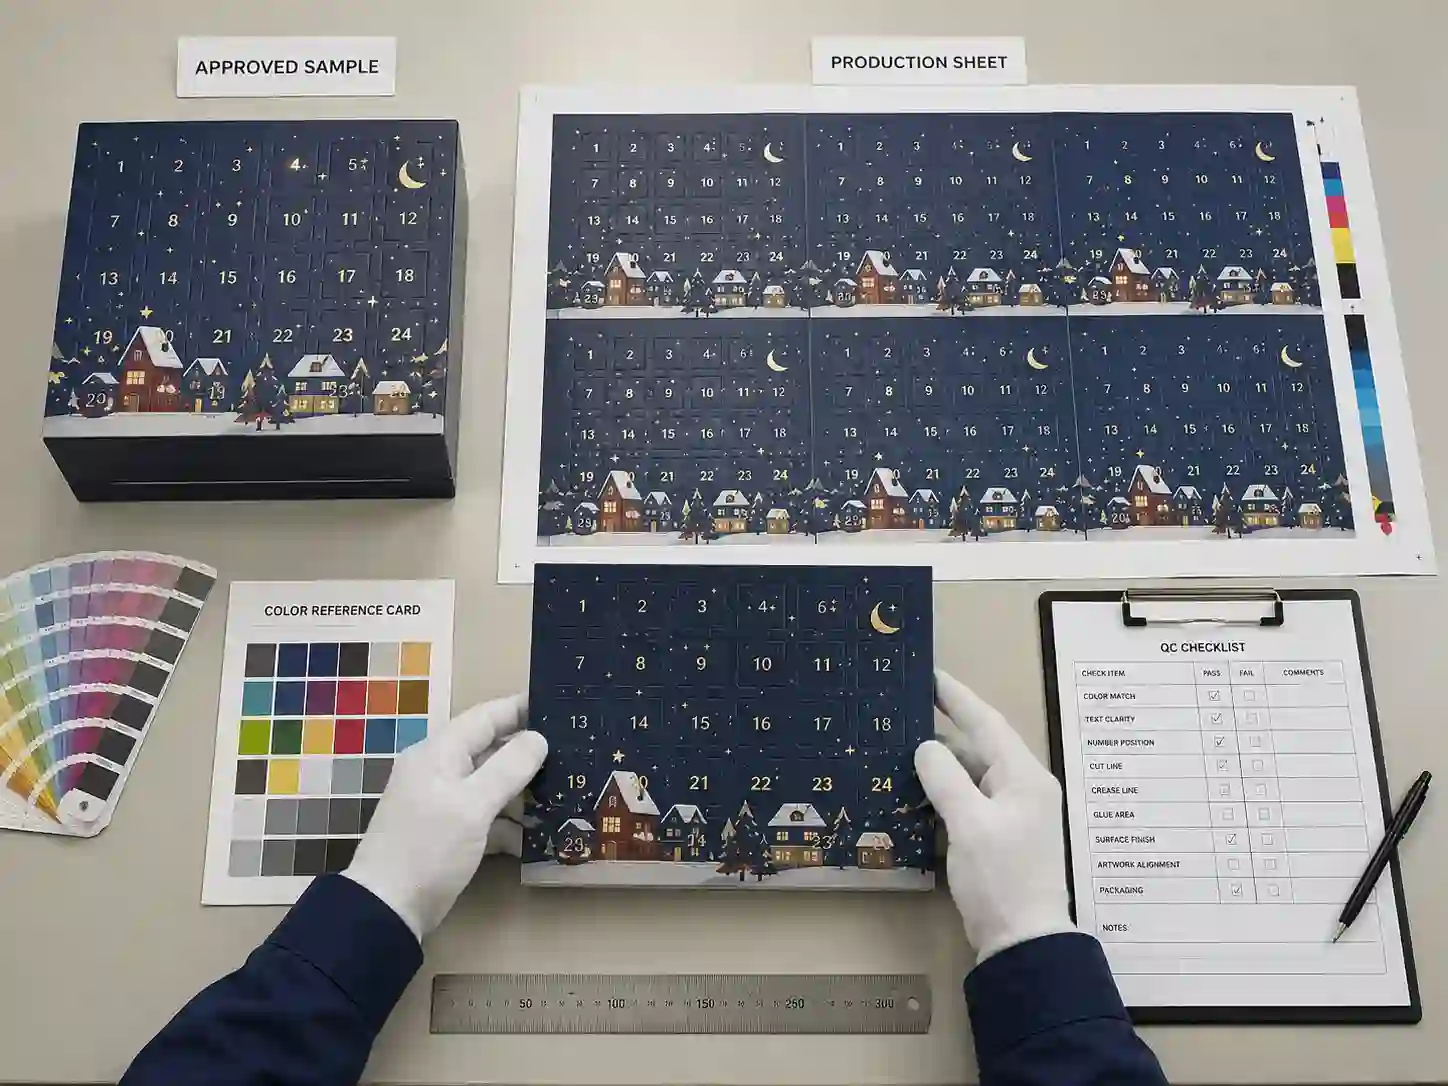
QC points for printed advent calendar boxes
- Color consistency between approved sample and bulk production
- Correct artwork version and language version
- Accurate numbering and compartment order
- Clean die cutting and creasing
- Stable drawer, door, or folding performance
- Correct insert material and cavity size
- No major glue marks, scratches, dents, or visible stains
- Proper export carton packing and shipping marks
For buyers who need supplier confidence, learning about the Giftpackpro packaging factory can help clarify production capability, sampling workflow, and export packaging support.
Final Checklist for Artwork Preparation
Good artwork preparation makes the whole project smoother. It reduces sample revisions, protects the launch schedule, and helps the final calendar box look consistent in retail, wholesale, or seasonal gift programs.
- Confirm the box structure before artwork design.
- Use the final production dieline, not a rough layout.
- Keep artwork layers clear and editable.
- Prepare bleed, safe zones, font outlines, and high-resolution images.
- Match artwork with insert material and compartment layout.
- Prepare product dimensions and product sequence.
- Confirm Pantone, CMYK, proofing, and finishing details.
- Review a sample before bulk production.
- Confirm QC standards and export packing requirements.
For custom seasonal packaging projects, Giftpackpro can support structure planning, dieline preparation, insert selection, sample review, bulk production, and export packing. Clear artwork preparation helps both the buyer and factory move faster with fewer avoidable revisions.