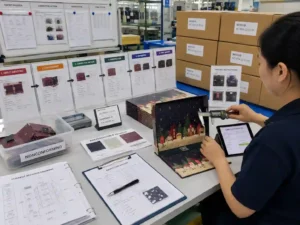
Quick answer: To confirm finishing advent calendar boxes before mass production, buyers should approve a physical pre-production sample made with the final paper, printing method, lamination, foil, embossing, spot UV, structure, and insert. Check finishing position against the dieline, compare color under controlled lighting, inspect wrapped edges and corners, test doors or drawers repeatedly, and document acceptable tolerances with photographs and signed approval notes. The purchase order and quotation should identify every finish by location, size, material, color, and process. Mass production should not begin until the supplier confirms the approved sample, inspection criteria, lead time, packing method, and responsibility for correcting deviations.
Finishing is not only decorative. On custom advent calendar boxes, it can affect folding accuracy, board warping, drawer movement, door perforation, surface durability, assembly speed, packing efficiency, and final cost. A reliable confirmation process therefore connects artwork approval with packaging engineering, purchasing terms, quality control, and export preparation.
What should buyers understand before selecting advent calendar box finishing?
Buyers should first understand that the same finish can perform differently on a rigid box, folding carton, drawer box, or door-opening box. The correct process depends on the substrate, printed color, surface area, crease position, assembly method, expected handling, and target retail presentation.
For example, a large solid foil panel may look attractive on artwork but can be difficult to transfer evenly across textured paper. Heavy embossing near a folding crease can crack the printed surface or reduce folding accuracy. A thick gloss spot UV layer across a perforated door may make the door harder to open cleanly. Matte lamination can provide a premium appearance, but dark colors may still show fingerprints, rubbing, or polishing marks during assembly and transport.
Before choosing a finish, buyers should define:
- The box structure and whether it is supplied assembled or flat packed.
- The paperboard or greyboard thickness and surface paper.
- The location of folds, wrapped edges, drawer openings, magnets, ribbons, and perforated doors.
- The expected appearance under retail, studio, warehouse, and daylight conditions.
- The required resistance to scratching, rubbing, moisture, fingerprints, and adhesive marks.
- The acceptable cost, MOQ, sampling schedule, and mass-production lead time.
A buyer comparing custom advent calendar box products should evaluate finishing together with structure and product loading rather than treating it as a separate artwork decision.
Which box structures create the greatest finishing risks?
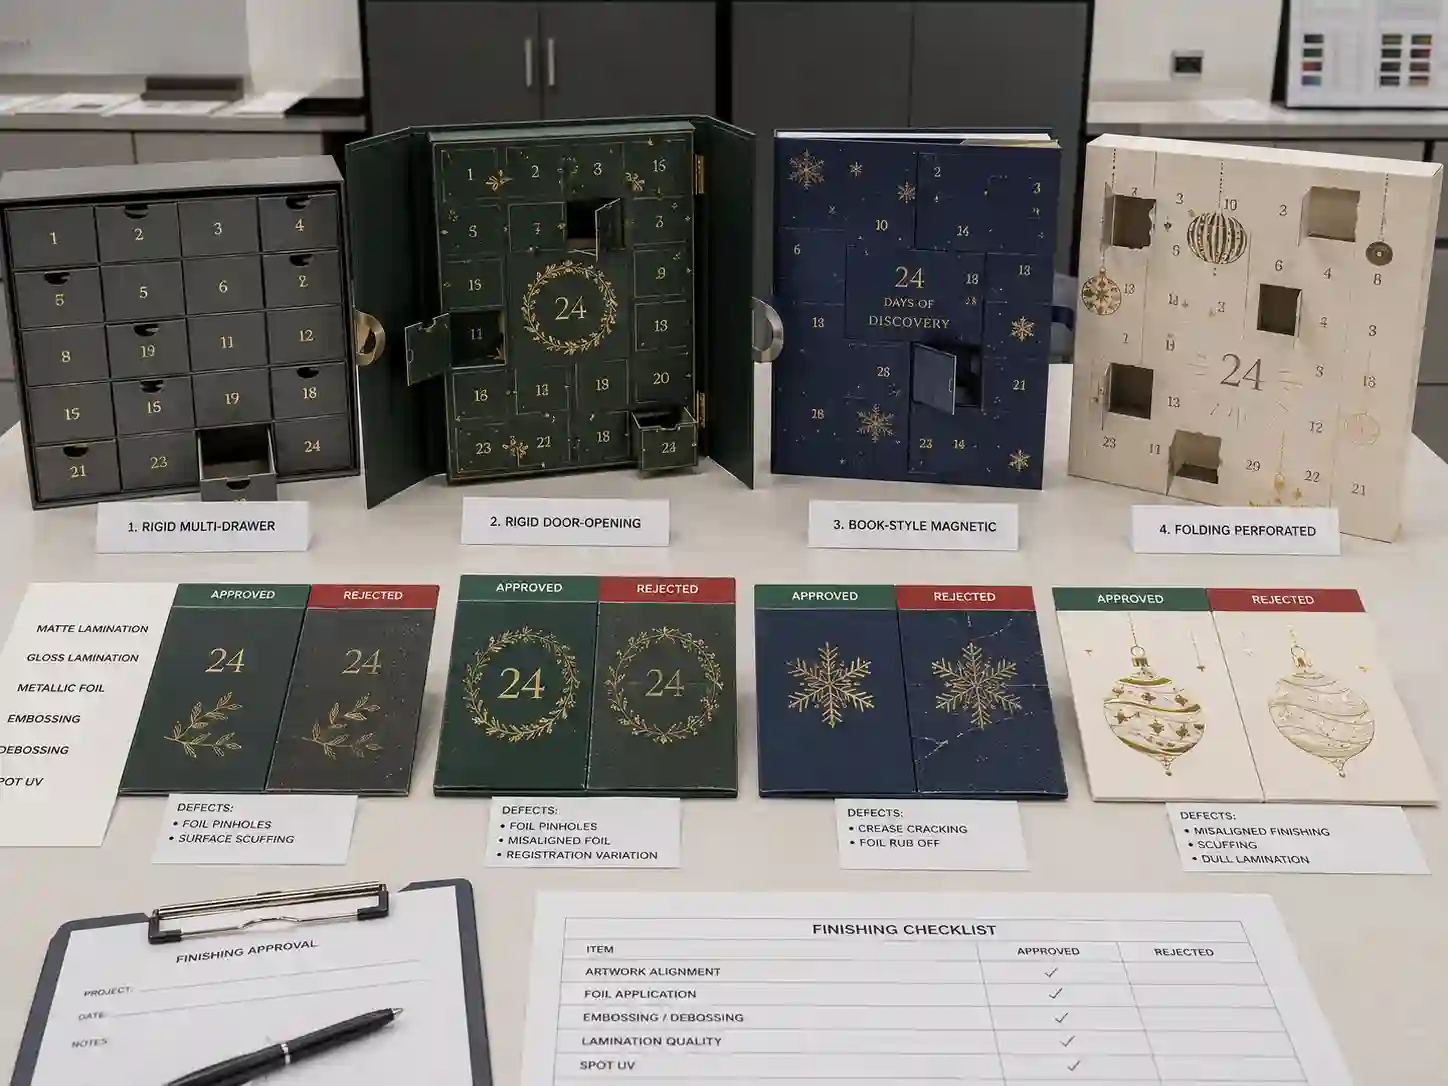
Rigid boxes usually require the closest control of wrapped edges, foil alignment, corner appearance, and surface cleanliness. Folding cartons require more attention to cracking, crease performance, glue areas, perforations, and registration after die-cutting.
| Box structure | Typical finishing concern | What the buyer should confirm |
|---|---|---|
| Rigid door-opening box | Foil or spot UV crossing doors, perforations, or wrapped edges | Door alignment, clean opening, finish registration, edge wrapping, and resistance to cracking |
| Rigid multi-drawer box | Scuffing around drawer openings and inconsistent foil position across multiple fronts | Drawer clearance, repeated front-panel alignment, ribbon position, and rub resistance |
| Book-style magnetic rigid box | Board warping, spine cracking, magnet pressure marks, and foil alignment across the cover | Flatness, hinge movement, magnet closure, spine durability, and wrapped-paper tension |
| Folding paperboard carton | Lamination or ink cracking at folds and interference with glue adhesion | Crease tests, glue-zone masking, die-cut registration, and flat-pack assembly performance |
| Fold-out or modular calendar | Visual mismatch between connected panels and accumulated assembly tolerances | Panel-to-panel color consistency, hinge alignment, finish direction, and final loaded stability |
Buyer tip: Ask the factory to mark every fold, perforation, glue zone, wrapped edge, foil area, embossing area, and spot UV area on the production dieline. A finish should not be approved from a flat artwork PDF without considering how that artwork moves during die-cutting, wrapping, gluing, and assembly.
How should buyers compare foil, embossing, spot UV, and lamination?
Buyers should compare finishes by visual effect, manufacturing tolerance, durability, cost, and compatibility with the selected material. The most expensive option is not automatically the most suitable option.
When is foil stamping appropriate?
Foil stamping is suitable for logos, numbering, borders, short text, and controlled decorative areas. Buyers should specify the foil color, gloss level, stamping position, and approved supplier reference. “Gold foil” is not a complete production specification because different gold foils can appear yellow, bronze, pale, matte, or highly reflective.
Inspect foil for pinholes, incomplete transfer, excessive pressure, blurred edges, double images, scratches, and position variation. Fine reversed text, large solid foil areas, textured paper, and foil placed close to a wrapped edge usually need extra testing.
What should be checked for embossing or debossing?
Embossing raises the design, while debossing presses it into the surface. Both processes require approval of depth, edge definition, position, and the appearance on the reverse side. Deep embossing can deform thin paperboard, expose stress marks on laminated surfaces, or interfere with an insert, drawer, magnet, or internal component.
For rigid boxes, confirm whether the embossing is applied to the wrapping paper before mounting or pressed after the board has been wrapped. The production route can change sharpness, registration, cost, and board deformation.
When does spot UV need additional testing?
Spot UV provides gloss contrast over selected printed areas. It should be checked for registration, edge cleanliness, dust marks, cracking, blocking, and surface consistency. A thick coating close to creases, perforations, cutting lines, or wrapped corners can create functional problems.
Buyers should also confirm whether the effect is standard spot UV, raised UV, textured UV, or another coating. These processes have different thicknesses, drying requirements, tolerances, and costs.
How should matte and gloss lamination be selected?
Matte lamination reduces glare and can create a restrained premium appearance. Gloss lamination increases reflectivity and color saturation and is generally easier to wipe clean. Both should be tested for adhesion, curling, scratching, fold cracking, silvering, and compatibility with foil, glue, and spot UV.
For dark solid colors, request a rub test and handling test because assembly marks may be more visible than they appear on a small proof. For folding cartons, request a creased and folded sample rather than approving an unconverted laminated sheet.
How do material and printing choices affect finishing approval?
The final finish should be tested on the actual production material. A finish approved on smooth coated paper may not transfer, reflect, or register the same way on uncoated, textured, recycled, or specialty wrapping paper.
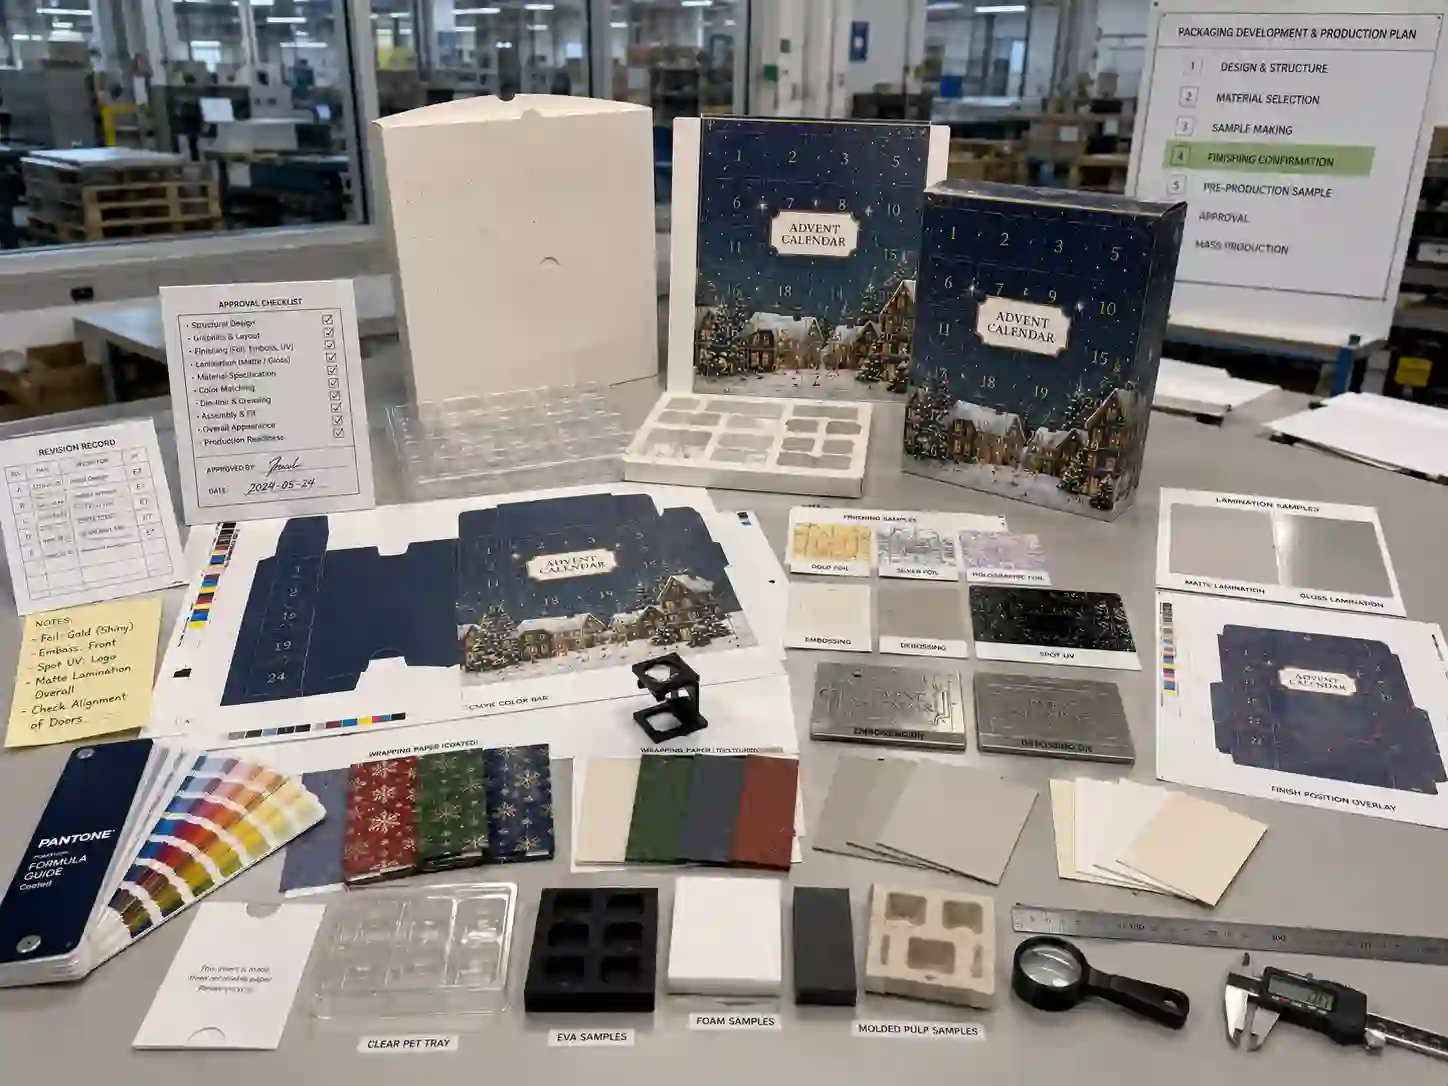
The finishing sample should use the approved paperboard or wrapping paper, greyboard thickness, printing method, lamination, and surface treatment. Buyers should confirm the following relationships:
- CMYK and lamination: Lamination can change apparent color depth, contrast, and gloss.
- Pantone colors and foil: Reflective foil may visually alter nearby colors under different lighting.
- Textured paper and foil: Surface texture can produce incomplete foil transfer or less-defined edges.
- Dark printing and matte surfaces: Fingerprints, scratches, glue marks, and polishing can become more visible.
- Recycled paper and spot coatings: Surface absorbency and variation may affect gloss uniformity.
- Folding paperboard and lamination: Incorrect grain direction or crease preparation may cause cracking.
Factory tip: A digital print prototype is useful for checking layout and structure, but it may not accurately represent offset-print color, production foil, embossing depth, spot UV thickness, or final lamination. The buyer should know which features are simulated and which are production-representative.
What sample should be approved before mass production?
For finishing approval, the safest reference is a physical pre-production sample made as closely as possible to the intended production process. A blank prototype confirms structure, while a printed sample confirms graphics; neither alone necessarily confirms final finishing performance.
A complete approval sequence may include:
- Dieline review: Confirm dimensions, doors, drawers, cut lines, folds, glue areas, insert cavities, and finishing positions.
- Artwork proof: Check text, numbering, barcode placement, CMYK images, Pantone references, overprint settings, and finish layers.
- Material confirmation: Approve paper, paperboard, greyboard, lamination, insert material, ribbons, magnets, and accessories.
- Finishing test: Produce foil, embossing, spot UV, varnish, or lamination samples on the selected surface.
- Assembled sample: Review the finish after die-cutting, wrapping, gluing, assembly, insert installation, and loading.
- Signed pre-production sample: Record approval date, revision number, agreed deviations, and reference photographs.
Buyers using custom advent calendar box services should ask whether the quoted sample is a digital mock-up, blank prototype, digitally printed sample, fully finished sample, or production-line pre-production sample. These are not interchangeable.
How can buyers confirm finishing advent calendar boxes consistently?
To confirm finishing advent calendar boxes consistently, buyers need measurable inspection points instead of relying only on comments such as “looks good” or “premium quality.” The approved sample, dieline, color reference, finishing reference, and written defect criteria should work together.
Practical finishing approval checklist
- Confirm the artwork revision and dieline revision numbers match.
- Check finish position relative to cutting, creasing, perforation, doors, drawers, and wrapped edges.
- Compare foil color and reflectivity with the approved physical reference.
- Inspect foil edges for pinholes, missing areas, blur, excessive pressure, or double stamping.
- Check embossing or debossing depth, sharpness, alignment, and reverse-side deformation.
- Inspect spot UV for registration, dust, bubbles, cracking, uneven gloss, and blocking.
- Check matte or gloss lamination for adhesion, scratches, silvering, curling, and delamination.
- Compare CMYK and Pantone colors under consistent lighting.
- Check dark surfaces for fingerprints, glue marks, rubbing, and polishing.
- Open every selected door and operate representative drawers after finishing.
- Load actual or weight-equivalent products into the insert.
- Confirm that finishing does not interfere with magnets, ribbons, glue, folds, or insert fit.
- Photograph approved details and any accepted limitations.
- Sign and date the sample before authorizing mass production.
QC tip: A finish can pass visual inspection while failing functional inspection. Door opening, drawer movement, folding, stacking, product loading, and carton packing should be tested after all surface processes are complete.
How should finishing tolerances be discussed with a supplier?
Buyers should ask suppliers to state realistic manufacturing tolerances for registration, position, color variation, embossing depth, wrapped-edge alignment, and acceptable surface defects. Tolerances should reflect the structure and process rather than being copied from an unrelated product.
Important questions include:
- How much foil or spot UV position variation is expected?
- How will the factory control alignment across 24 doors or multiple drawer fronts?
- What level of minor pinholes, scratches, dust, or edge variation is considered acceptable?
- Will the supplier provide a first-off production sample before the full run continues?
- Which defects trigger rework, replacement, sorting, or rejection?
- How are approved color and finishing references stored on the production floor?
Complex calendars often contain repeated panels, doors, or drawers. Small positional differences can become visually obvious when the same foil border or number style appears many times. The QC plan should therefore inspect both individual components and the assembled pattern.
How should importers compare China factories for finishing work?
Importers should compare factories using process capability, communication quality, documentation, sampling accuracy, subcontractor control, lead time, and corrective-action procedures—not quotation price alone.
| Supplier comparison point | Evidence to request | Warning sign |
|---|---|---|
| Finishing capability | Relevant physical samples and explanation of in-house versus outsourced processes | Only edited photographs or unrelated sample types |
| Quotation accuracy | Separate description of paper, printing, lamination, foil, embossing, UV, assembly, insert, and packing | One vague unit price without specifications |
| Sample control | Revision log, approval form, material references, and sample production method | Frequent revisions without version numbers |
| Quality control | Incoming, in-process, assembly, and final-inspection checkpoints | Inspection only after all boxes are packed |
| Lead-time control | Timeline for materials, printing, finishing, assembly, inspection, and export packing | A single delivery promise without process milestones |
| Communication | Clear answers about tolerances, risks, alternatives, and approval deadlines | Automatic agreement without identifying production risks |
| Payment and correction terms | Written payment stages and responsibility for non-conforming production | Unclear remake, sorting, or compensation procedures |
A capable supplier should explain where a requested finish may create cracking, poor transfer, slow production, high rejection rates, or assembly problems. Buyers can review the background and production approach of the Giftpackpro packaging factory when assessing supplier suitability.
How do finishing decisions affect MOQ, cost, and lead time?
Finishing affects cost through tooling, setup, material usage, registration difficulty, production speed, manual handling, rejection risk, and the number of separate operations. MOQ may also be influenced by printing setup, foil roll availability, specialty paper purchasing, subcontractor minimums, and assembly requirements.
Common cost drivers include:
- The number of foil colors or separate stamping positions.
- Large solid foil areas or very fine foil details.
- Custom embossing and debossing dies.
- Multiple spot UV layers or raised coatings.
- Specialty, textured, metallic, or dyed-through paper.
- Extra masking around glue zones, folds, or perforations.
- Manual cleaning, sorting, tissue protection, or protective film.
- Tight registration requirements across doors, drawers, or connected panels.
- Low order quantities that still require full tooling and setup.
Lead time should be divided into artwork confirmation, tooling, material preparation, printing, curing, lamination, finishing, die-cutting, assembly, QC, and packing. Foil, UV, and laminated sheets may require conditioning or drying time before later processes. Starting assembly too early can increase scratching, blocking, odor, or adhesion problems.
What should be included in a finishing quotation?
A finishing quotation should describe exactly what will be produced. Buyers cannot compare suppliers accurately when one quote includes production foil and another assumes a printed metallic effect.
Prepare the following RFQ information:
- Box style, finished dimensions, and open dimensions.
- Product dimensions, weights, quantities, and loading orientation.
- Insert type: paper insert, PET tray, EVA insert, foam, or molded pulp.
- Paperboard or greyboard thickness and external wrapping material.
- Printing method, CMYK artwork, Pantone colors, and ink coverage.
- Lamination type and whether it covers the full sheet or selected areas.
- Foil color, foil area, number of positions, and reference image or sample.
- Embossing or debossing artwork, area, depth expectation, and registration requirement.
- Spot UV type, coverage, and relationship to folds or cutting lines.
- Order quantity, target delivery date, destination, and shipment method.
- Sample level required and approval deadline.
- QC expectations, inspection arrangement, and export-packing requirements.
Ask suppliers to identify assumptions and exclusions. The quotation should state whether tooling, samples, color proofs, freight, pallets, testing, taxes, and replacement parts are included or charged separately.
How should QC, export packing, and shipping protection be confirmed?
Finishing quality must be protected after production. A visually approved box can arrive scratched, rubbed, dented, or blocked if the export carton, divider, sleeve, tissue, stacking direction, or pallet plan is unsuitable.
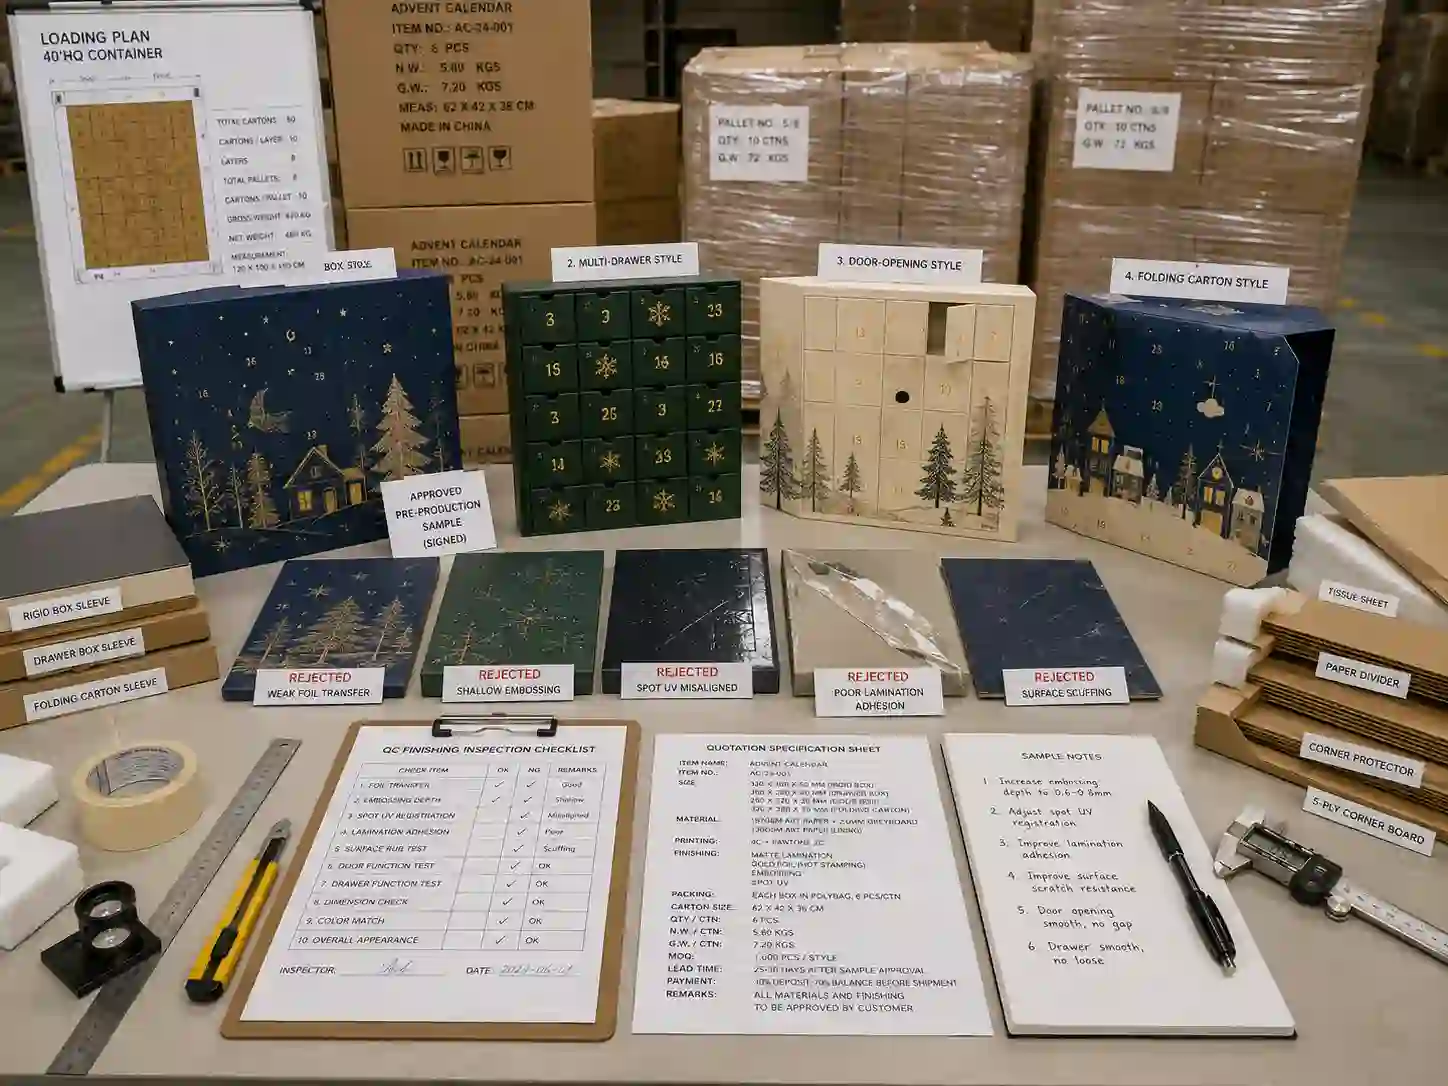
For finished rigid boxes, consider tissue sheets, protective sleeves, paper dividers, corner protection, fitted inner cartons, and limits on carton weight. For folding cartons, confirm flat-packing orientation, bundle pressure, moisture protection, and whether foil or UV areas contact each other.
The packing specification should identify:
- Quantity per inner carton and export carton.
- Box orientation and separation materials.
- Carton dimensions, gross weight, and net weight.
- Corrugated board strength or agreed carton specification.
- Shipping marks, barcode labels, carton numbers, and destination details.
- Pallet size, stacking pattern, corner boards, straps, and stretch wrap.
- Maximum stacking height and protection from crushing or movement.
- Requirements for drop, vibration, compression, or transport testing.
Where transport validation is important, buyers can review test procedures from the International Safe Transit Association. Buyers requesting responsibly sourced paper may also verify chain-of-custody claims through the official Forest Stewardship Council rather than accepting an unsupported logo or statement.
Which finishing option should a buyer choose?
The correct option depends on the visual objective, box structure, handling risk, budget, and required production consistency. Use the following decision guide before approving artwork.
- Choose foil stamping when a reflective metallic accent and strong logo definition are priorities, provided the surface and detail are suitable.
- Choose embossing or debossing when tactile depth is important and the board can accept pressure without functional deformation.
- Choose spot UV when controlled gloss contrast is needed over printed artwork and registration tolerance is acceptable.
- Choose matte lamination for a restrained surface appearance, while allowing for fingerprint and rubbing checks on dark colors.
- Choose gloss lamination when brighter color, reflectivity, and easier surface cleaning are preferred.
- Reduce finishing complexity when the calendar has many folds, perforations, wrapped edges, small repeated components, a tight launch date, or a limited budget.
For many projects, one well-controlled primary finish produces a more consistent result than several overlapping effects that increase registration risk and lead time.
What common finishing approval mistakes should buyers avoid?
The most common mistake is approving a visual concept without confirming whether the finished structure can be produced consistently. Buyers should also avoid the following:
- Approving foil color from a screen instead of a physical reference.
- Using a digital sample as proof of production foil, UV, or embossing performance.
- Placing finishing too close to folds, perforations, cut edges, or glue zones.
- Changing artwork after dies or plates have been made without reviewing cost and registration.
- Failing to test drawers, doors, magnets, ribbons, and inserts after finishing.
- Comparing quotations that use different paper, processes, packing methods, or sample standards.
- Starting mass production without a signed pre-production sample and revision record.
- Inspecting appearance but not rubbing, stacking, loading, packing, and transport performance.
- Leaving accepted tolerances and correction responsibilities undefined.
Frequently asked questions about confirming finishing
Can buyers approve finishing from a PDF proof?
A PDF proof can confirm layout, text, numbering, and finish position, but it cannot reliably confirm foil reflectivity, embossing depth, spot UV thickness, lamination feel, surface durability, or the interaction between finishing and assembly. A physical sample or production-representative test is recommended.
Is a fully finished sample always necessary?
It is most important when the project uses specialty paper, large foil areas, fine foil details, embossing, raised UV, dark matte surfaces, complex wrapped structures, or finishing near doors and folds. Simpler projects may use approved finishing swatches plus an assembled printed sample, but the limitations should be documented.
Should finishing be checked before or after product loading?
Both stages matter. The empty box should be checked for appearance and function, and the loaded box should be checked for deformation, insert movement, drawer pressure, door opening, stacking, and transport risk.
How many samples should a buyer review?
The quantity depends on complexity and risk. At minimum, the buyer should review representative surfaces, repeated doors or drawers, corners, folds, and functional areas. For mass production, QC should inspect samples from different production times, assembly lines, and export cartons rather than only the first finished unit.
Can finishing specifications change after sample approval?
Changes are possible, but they may require new artwork, tooling, material tests, samples, cost approval, and a revised lead time. Every change should receive a new revision number and written confirmation before production continues.
How can buyers learn more before choosing a supplier?
Review practical advent calendar box buying guides, compare physical samples, and ask each supplier to explain its production route, QC checkpoints, subcontracted processes, export packing, lead time, and quotation assumptions.
What should buyers prepare before requesting a sample or quotation?
Before contacting a custom advent calendar boxes manufacturer, prepare the box style, dimensions, product list, insert preference, target quantity, artwork status, paper choice, printing colors, finishing locations, sample requirements, delivery deadline, destination, and packing expectations.
To confirm finishing advent calendar boxes efficiently, include an annotated dieline showing every foil, embossing, spot UV, lamination, perforation, fold, and glue area. Also provide physical color or foil references when appearance is critical. Giftpackpro can then review structure, insert fit, finishing feasibility, sample stages, MOQ factors, QC requirements, lead time, and export packing before you request a custom quote.