Quick answer: A mini beverage bottle upright insert should control the bottle at more than one point, limit sideways movement, support its weight, protect the cap or closure from load, and keep neighboring products separated. The correct cavity dimensions depend on the finished primary-packed bottle, including its body diameter, shoulder, cap, label area, weight, and dimensional tolerances. For export shipping, verify the design with loaded samples in the intended shipping orientation rather than relying only on nominal bottle dimensions.

How does an insert keep mini beverage bottles upright?
An effective insert keeps a mini bottle upright by controlling lateral movement around a stable part of the bottle while providing sufficient support below or around the body. It should not depend on the cap, neck finish, label, or decorative component to carry shipping loads unless that feature has specifically been evaluated for that purpose.
For an advent calendar, simply making a rectangular compartment slightly larger than the bottle is often insufficient. A tall bottle in a loose cavity can tilt, strike the compartment walls, transfer weight into adjacent products, or push against the calendar face when the packed unit changes orientation during handling.
Useful structural approaches include a fitted paperboard cavity around the bottle body, a neck-locating feature combined with lower-body support, or a multi-level paper insert that controls both the lower and upper sections. The appropriate arrangement is project-dependent because bottle geometry, paperboard structure, calendar depth, and neighboring products vary.
What dimensions should you collect for a mini beverage bottle upright insert?
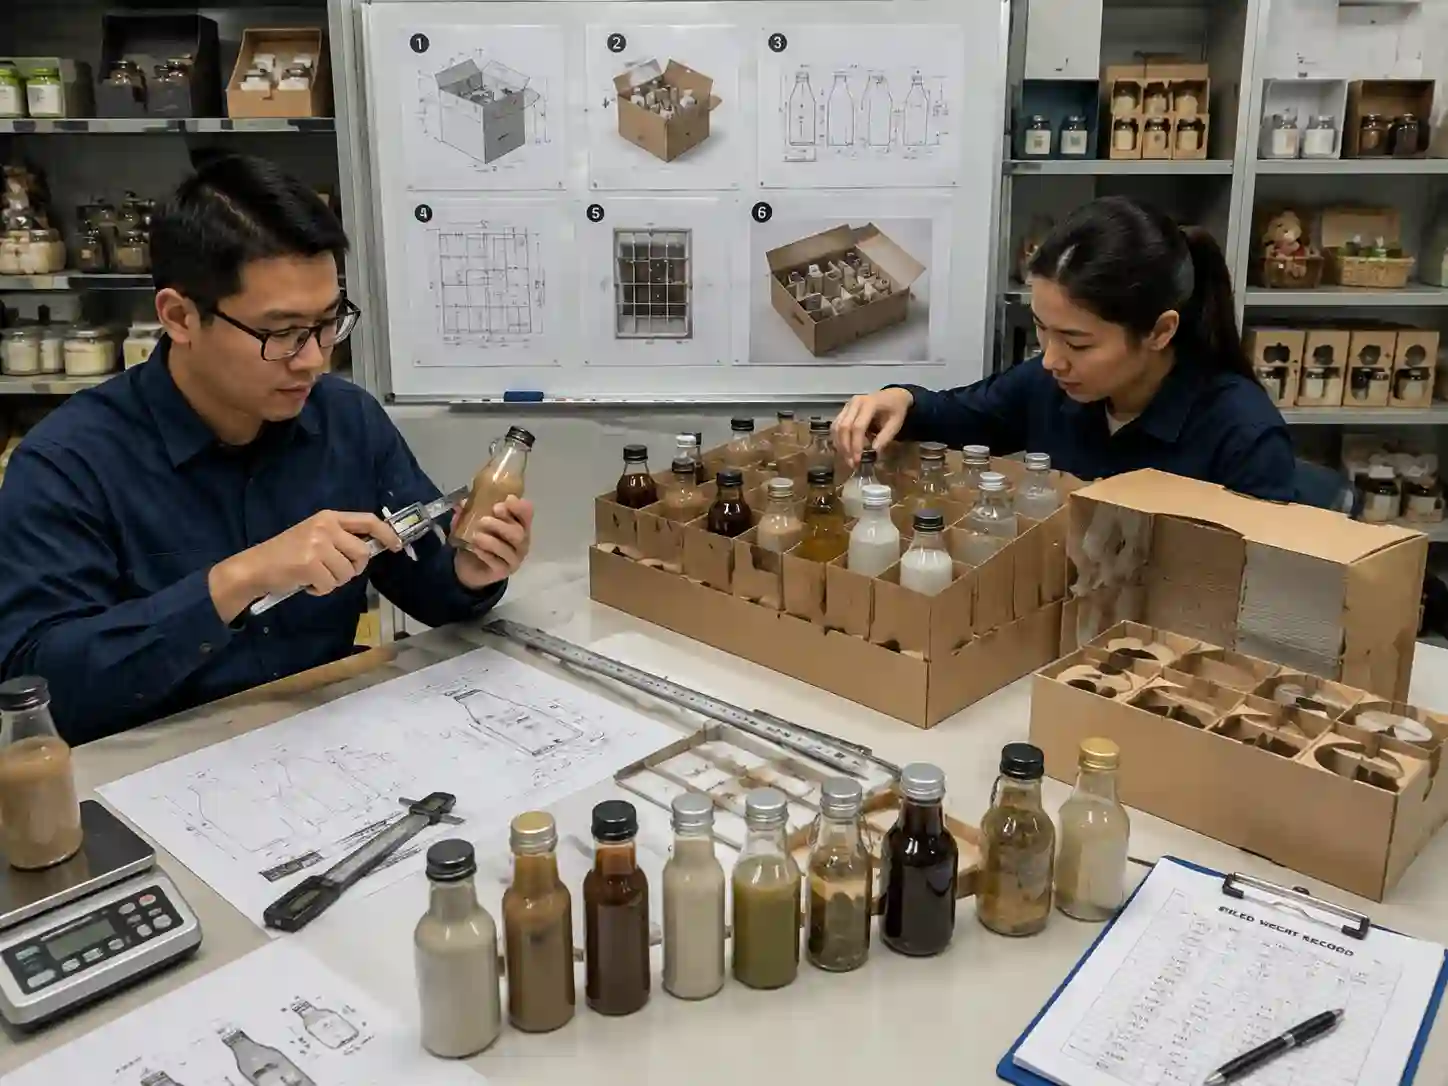
Measure the actual finished bottle and its primary packaging before finalizing the cavity. Supplier drawings are useful references, but physical samples help confirm features that may affect fit, including label edges, cap geometry, filled weight, seams, and dimensional variation.
- Maximum bottle body diameter or width and depth
- Overall filled-bottle height
- Shoulder and neck dimensions
- Cap, crown, stopper, or closure diameter and height
- Filled bottle weight
- Label position and any raised or vulnerable label edges
- Base geometry and contact area
- Any outer sleeve, bag, wrap, or secondary pack that remains on the bottle
Measure several representative production-intent samples where possible. The design should accommodate realistic product variation without becoming so loose that the bottle loses positional control.
Where should the insert restrain the bottle?
The preferred restraint points are usually stable bottle-body areas that can tolerate normal packaging contact. Avoid creating concentrated pressure on closures, tamper features, thin labels, fragile shoulders, or other vulnerable areas without confirming that the product can withstand it.
A useful design principle is to separate location from load support. An upper feature may limit sideways movement, while a lower platform or cavity carries the bottle’s weight. This reduces the risk of suspending a heavy filled bottle from its neck or cap.
For narrow bottles, controlling only the base may leave excessive leverage at the top. Conversely, a tight neck slot with an unsupported base can concentrate loads in the wrong place. A loaded prototype shows whether both restraint points work together.
How much clearance should the bottle have?
There is no universal clearance value because it depends on bottle tolerances, insert material, assembly method, surface sensitivity, and required retention. The objective is controlled clearance: enough for repeatable packing and removal, but not enough for excessive tilt, impact, or rattling.
Record the proposed cavity dimensions on the structural drawing and compare them with measured maximum product dimensions. Fit should then be confirmed physically rather than approved from CAD alone.
| Fit condition | Likely risk | What to verify |
|---|---|---|
| Cavity too loose | Bottle tilting, rattling, impact against partitions | Lateral movement and top displacement in a loaded sample |
| Cavity too tight | Label abrasion, difficult packing, bottle pressure | Insertion force, surface condition and removal access |
| Upper restraint too high | Pressure on cap or closure | Contact position after full assembly |
| Insufficient lower support | Insert deformation or bottle sinking | Loaded insert condition under actual bottle weight |
| Insufficient calendar depth | Front or rear panel bulging | Closed loaded-calendar profile |
How do bottle weight and compartment layout affect upright stability?
Filled weight matters because a mini beverage bottle can impose substantially different loads from lightweight sachets, confectionery, or stationery. The insert must therefore control not only cavity geometry but also how concentrated weight is distributed through the calendar structure.
A group of heavy bottles in one area may deform a paper insert or make the finished calendar unbalanced. Where multiple bottles are used, review their positions on the complete cavity layout rather than treating each compartment independently.
Check the loaded insert for local bending, partition distortion, movement into neighboring cavities, and pressure against outer panels. These checks are especially important when mini bottles are combined with tea, coffee, confectionery, toys, pet treats, jewelry, candles, or other products with very different weights and shapes.
How should mini bottles be separated from other products?
Each bottle should have sufficient structural separation to prevent direct contact with adjacent products during normal handling. The paper insert provides physical positioning and separation; it should not be assumed to replace the beverage’s required primary packaging or provide a functional odor, liquid, or contamination barrier.
The bottle’s primary closure and packaging remain the critical product boundary. If leakage, aroma transfer, or food-contact requirements are relevant, those issues need to be addressed at the product and primary-packaging level rather than solved by tightening a paperboard cavity.
Also check whether neighboring flexible packs can migrate toward the bottle, become pinched between structural parts, or interfere with the bottle’s restraint features.
How do you check whether bottles remain upright during export shipping?
Verify the complete packed configuration, not an empty insert. The strongest evidence comes from production-intent bottles loaded into a representative calendar, followed by handling and transport-related checks appropriate to the project’s distribution route.
- Confirm each bottle SKU and intended cavity position against the approved layout.
- Measure representative finished bottles and compare them with the recorded cavity dimensions.
- Load the insert using the intended packing method.
- Check that the base is supported and upper restraint does not load the closure.
- Close the calendar and inspect the front, back, and edges for bulging or distortion.
- Change the packed unit’s orientation and check for excessive bottle movement.
- Inspect labels, closures, partitions, and insert surfaces after the agreed handling or shipping evaluation.
- Record observations against the approved sample, drawings, and inspection criteria.
The exact transport test method and acceptance limits should be agreed for the project. Export route, master-carton configuration, palletization, parcel handling, bottle material, filled weight, and final retail distribution can change the relevant risks.
What should buyers approve before production?
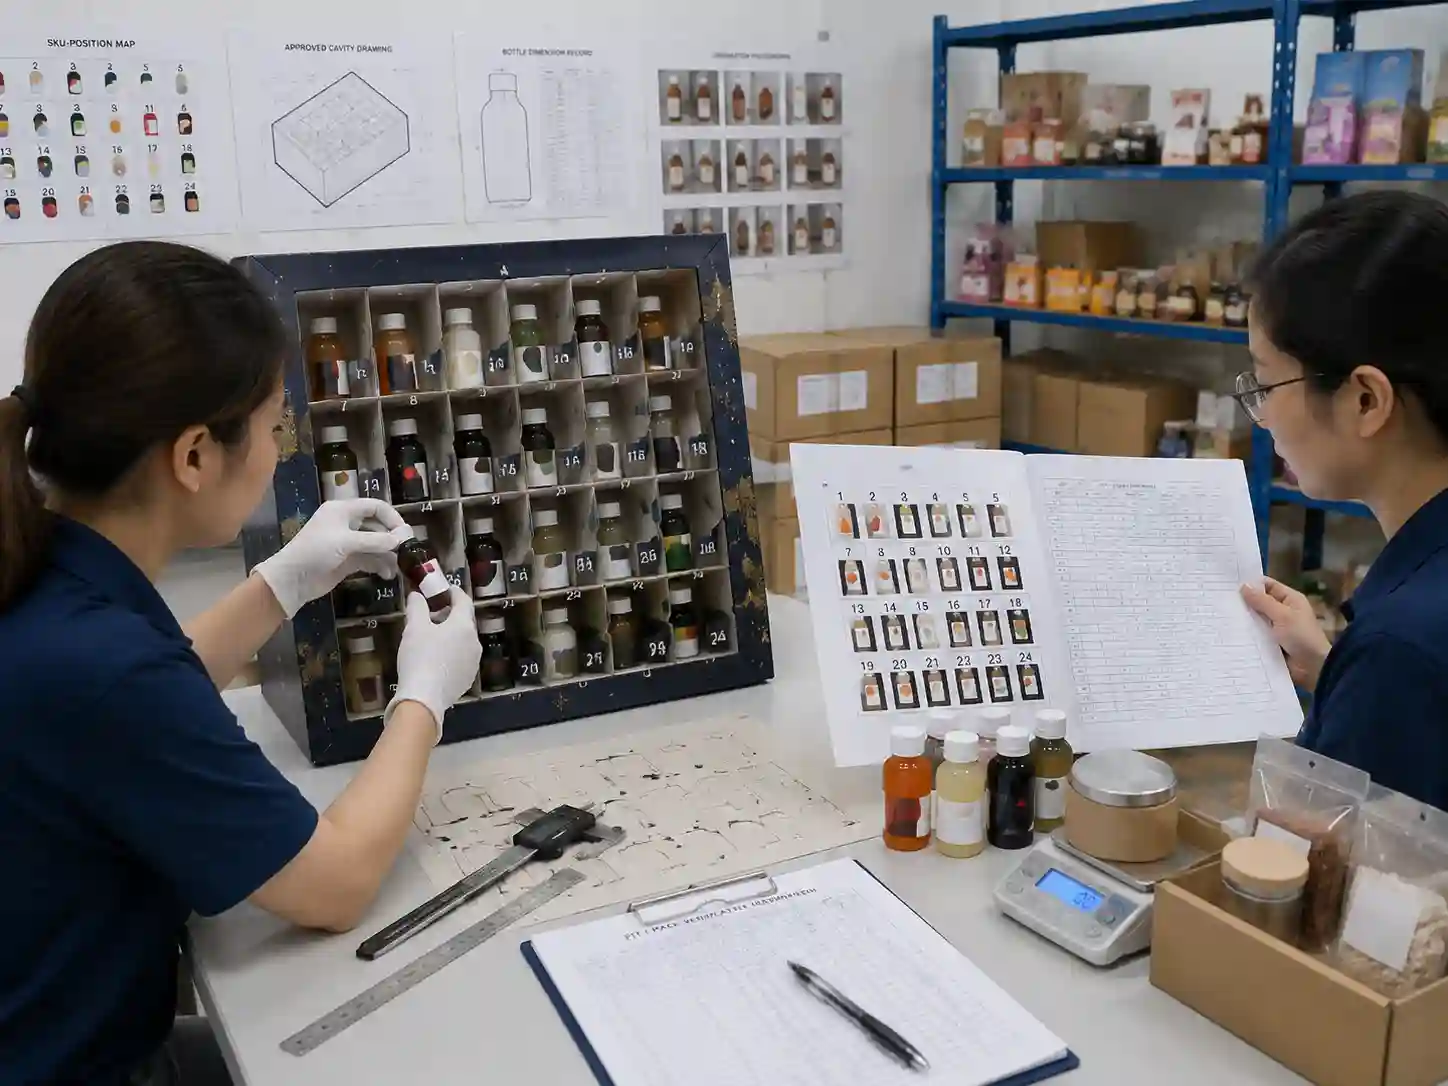
Buyer approval should establish a traceable reference for product fit rather than relying on a general statement that the bottle “fits.” Important records can include the final bottle specification, cavity drawing, loaded sample photographs, orientation map, approved physical sample, and agreed fit or movement criteria.
A practical fit checklist is:
- Bottle SKU and cavity position are correct.
- Finished bottle dimensions match the approved input range.
- Base remains properly supported.
- Bottle does not lean excessively in the cavity.
- Cap or closure is free from unintended structural pressure.
- Labels and primary packaging are not pinched or abraded.
- Adjacent products remain separated.
- Insert does not collapse or permanently distort under bottle weight.
- Calendar closes without visible panel bulging.
- Bottle remains acceptably located after the agreed handling check.
What should QC inspect during packing?
QC should compare production packing with the approved loaded reference and documented cavity layout. The inspection should focus on bottle identity, orientation, restraint, closure condition, primary-pack condition, insert deformation, and finished-calendar profile.
For mixed-SKU calendars, orientation records are particularly useful because two bottles with similar appearance may have different diameters, weights, or closures. A cavity designed for one bottle should not automatically be treated as interchangeable with another.
Useful evidence includes dimension records, SKU-position maps, approved product samples, insert drawings, packing photographs, and inspection checklists. These documents make deviations easier to identify and communicate between product developers, sourcing teams, the packaging supplier, and the packing operation.
Can the same insert hold different mini bottle sizes?
Sometimes, but the shared cavity must be verified against every intended bottle. A compromise cavity that is acceptable for the largest bottle may allow the smallest bottle to tilt excessively.
Where bottle diameters or heights vary significantly, project-specific cavity geometry or additional locating features may provide more predictable control. The decision should be based on measured products and loaded prototypes rather than nominal volume such as 30 ml, 50 ml, or 100 ml, because equal-volume bottles can have very different shapes.
FAQs about keeping mini beverage bottles upright
Should the insert grip the bottle cap?
Normally, the closure should not become the primary load-bearing feature unless the product and packaging design have been specifically evaluated for that contact. Supporting the bottle body and base generally gives the packaging engineer more control over shipping loads.
Does an upright insert prevent beverage leakage?
No. An insert can help maintain orientation and reduce unwanted movement, but leakage prevention depends primarily on the bottle, closure, seal, and other applicable primary-packaging controls.
Should glass and plastic mini bottles use the same cavity design?
Not automatically. Material, bottle geometry, surface sensitivity, weight, closure design, and dimensional tolerances can change the required restraint and clearance. Each intended bottle should be checked as a finished, filled product.
What information should you send to the packaging supplier?
Provide production-intent bottle samples or controlled dimensions, filled weights, closure details, required orientation, SKU-position layout, and any primary or secondary packaging that remains on each bottle. These inputs allow the structural design to be evaluated around the real packed product.
Giftpackpro can develop the paper structure as part of its custom advent calendar box services and review suitable formats from its custom advent calendar box products. For a project involving mini beverage bottles, request a custom quote with bottle dimensions, filled weights, product samples where available, and the proposed compartment layout.